HUD Button Layout Customisation
![]()
Users can customise the HUD Button Layout in the graphic area to suit their own particular requirements.
Access
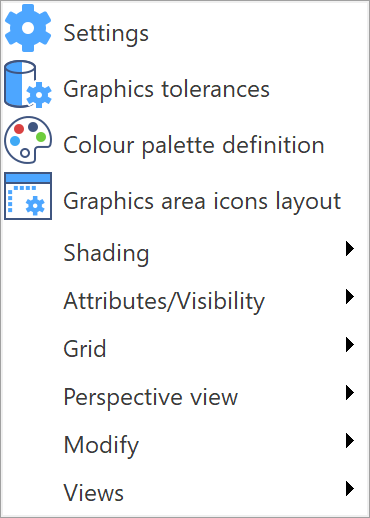
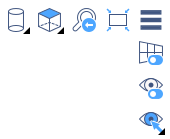
- Click on the
 Burger menu button in the current HUD buttons layout to display the following drop-down menu:
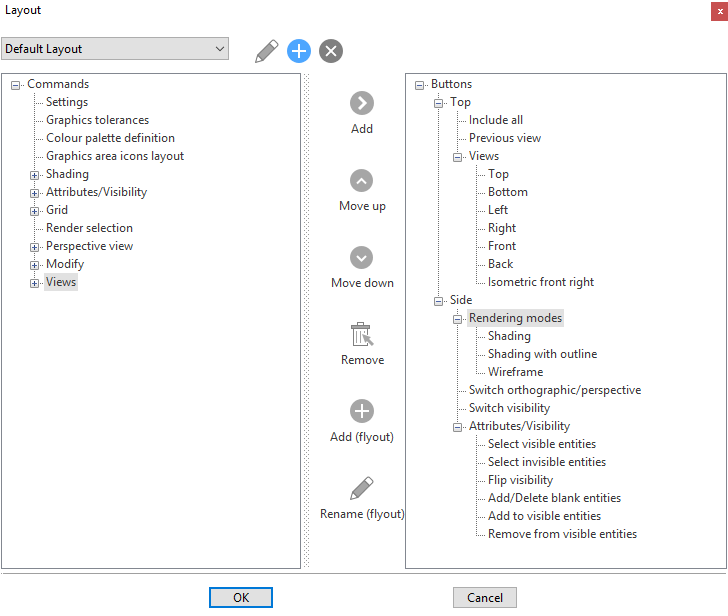
 - Click on the Graphics area icons layout entry to display the following Layout configuration dialog box which represents the current default layout configuration:
![]() Note:
Note:
The Default Layout cannot be modified.
Layout Description
|
Left Panel |
This panel contains all of the available functions which are grouped together by theme. Each group can be expanded (e.g. Shading) to show all individual functions or collapsed (e.g. Views). |
|
Right Panel |
The right panel contains all of the functions that are currently present in the HUD Button display in the graphic area. Again, functions are grouped together by themes which can be expanded and collapsed as in the left panel.
The primary levels - Top and Side - indicate that functions under this level are respectively displayed horizontally at the top of the graphic area or vertically along the side of the graphic area. |
|
|
|
|
Central Column |
The central column contains command icons for organizing the customised HUD Button layout in the graphic area. These allow you to execute
A flyout is a function button which is automatically displayed in the new HUD button layout after validation. |
|
Configuration Icons |
These three buttons, at the top of the dialog box next to the Layout name, concern configuration operations: |
|
|
Clicking on this icon displays the Renaming configuration dialog box which allows you to define a new name for the current configuration. |
|
|
Clicking on this icon displays the Copying configuration dialog box which allows you to copy the current configuration by defining a new name. |
|
|
Clicking on this icon deletes the current configuration. |
Example Procedures
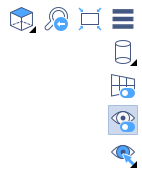
HUD Buttons default layout
Modifying the HUD button layout
Re-arranging the order of the existing HUD Button layout
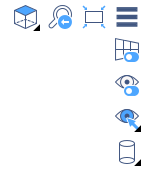
To move the Rendering modes group of functions to the bottom of the Side column:
- Copy the Default Layout and give it a new name in order to be able to modify it.
- Click on the Rendering modes group header in the right panel.
- Click on the
 Move down command 3 times to move the Rendering modes group to the bottom of the list.
 - Click OK to validate.
Some of the central column commands become active (only valid commands are activated).
The HUD button layout appears as follows in the graphic area:
![]() Notes:
Notes:
You can also re-arrange the order in which functions are displayed within a group using the same method.
You cannot move an individual function or a function group from the Top line to the Side column (and vice-versa) using the ![]() Move up and
Move up and ![]() Move down commands. Firstly, you must remove the function or function group from the right panel using the
Move down commands. Firstly, you must remove the function or function group from the right panel using the ![]() Remove command. This is explained below.
Remove command. This is explained below.
Removing a function group from the Side column and inserting it in the Top line
To move the Rendering modes command group from the second position in the Side column to the first position in the Top line:
- Copy the Default Layout and give it a new name in order to be able to modify it.
- Select the Rendering modes command group under the Side level in the panel on the right and then click the
 Remove command in the central column.
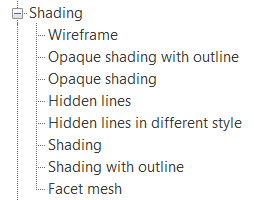
 - Expand the Shading functions group in the left panel:
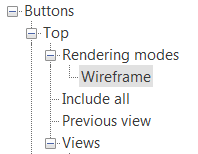
- Select the Top level under Buttons in the panel on the right.
- For example, select the Shading function and then click the
 Add (flyout) command.
 - Select Shading under the Top level in the right panel and click on the
 Rename (flyout) command.
 - Rename it as required, e.g. Rendering modes.
- Make sure that the Rendering modes flyout is selected in the right panel.
- Expand the Shading functions group in the left panel.
- Select the first function that you want to place in the Rendering modes flyout (e.g. Wireframe) and then click the
 Add command to transfer it under Rendering modes in the right panel.
 - Repeat this sequence to add the other required rendering modes to the group:
- Once you have completed entering the required functions, you can re-order them in the Rendering modes group by selecting an individual function and clicking the
 Move up and Move down commands.
The Rendering modes group is currently positioned in the Side HUD button column.
First, you must choose which of the Shading function buttons you want to display by default in the HUD button layout in the graphic area.
As this is the function group flyout, the name Shading will be displayed when you hold the cursor over the shading button in the HUD button display. This name can be changed to give it a more generic term.
This will highlight Shading in the right panel.
You can now add the different rendering mode functions that you want to make available in the HUD button display.
![]() Note:
Note:
Multiple selection is not possible when adding functions to a flyout functions group:
The following screenshot shows the Rendering mode flyout when 4 different modes were defined:
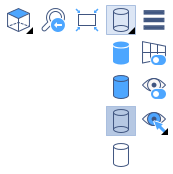
You can see that the Rendering modes group is immediately to the left of the Burger button but we want to place it in the first position on the extreme left of the Top line.
- Re-open the Layout configuration dialog box (Burger button > Graphics area icons layout).
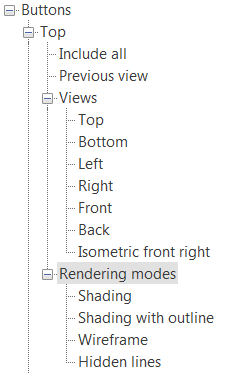
- Select the Rendering modes flyout header in the right panel and click the Move down command until it is positioned at the bottom of the Top line level (the Move down command becomes inactive), as shown below:
The HUD button layout in the graphic area now displays as follows:
For further information...