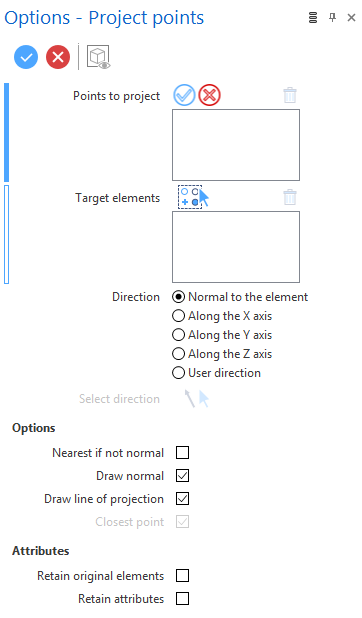
Project points
![]()
This function allows you to project points onto elements or faces.
Access
- Click the
 icon in the Project section of the Wireframe tab.
Or
- Type "Points" in the Quick Search field and select Points from the drop-drown list.
In both cases, the Options - Project points dialog box is displayed:
Procedure
- Select the appropriate Environments and Filters options.
- Select the point(s) to be projected.
- Select the element(s) or face(s) onto which the point(s) will be projected.
- Select the projection direction:
- Normal to the element
- Along the X axis
- Along the Y axis
- Along the Z axis
- User direction: This option allows you to select a custom direction using the Options tab of the ribbon. Click the
 icon to validate the selected direction.
 - Select the following Options, as required:
- Nearest if not normal: This option allows you to project the selected point on the shortest distance when the projection normal to the selected element is not possible, for example, on a curve.
- Draw normal: This option allows you to display the normal direction on the projected point(s).
- Draw line of projection: This option allows you to display the projection dotted line between the initial and projected points.
- Closest point: If you have selected several elements on which the points are to be projected, this option allows you to keep only the points that are closest to the original points.
-
Validate, either by a Right Mouse click or by clicking the
 icon in the graphic area or in the function dialog box.
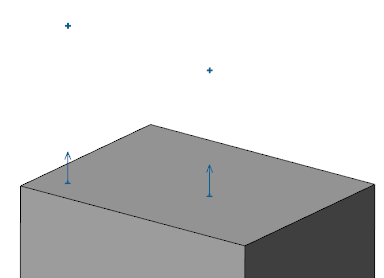
Points projected normal to a face, with normals displayed:
![]() Note:
Note:
- Use the Attributes toolbox to modify the created entities.
Attributes
Selecting the Retain original elements option allows you to keep the reference element after validating the function. It also makes the Retain attributes option available.
Selecting the Retain attributes options allows you to apply the attributes (colour, style) from the reference element to the offset/projected element.
Top Toolbar
![]()
![]()
![]()
These two icons at the top of the dialog box allow you to Apply the current values or to Cancel the current function.
Preview generation is Automatic if this option is active in the dialog box menu accessed by clicking on the  icon. If this option is not active, click on the
 ![]() icon. If preview generation is not possible, the icon is greyed out.
icon. If preview generation is not possible, the icon is greyed out.