Split Face
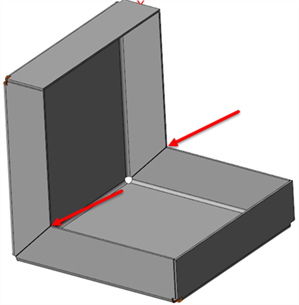
This function allows you to split faces on a shell.
Access
- In the Sheet metal tab of the ribbon, click the
icon in the Preparation section.
- Type split in the Quick Search field, and select
Split face from the result list.
In both cases, this opens the Split face - Options tab in the ribbon with the Filters section. This also opens the Split face dialog box. ![]() (See dialog box).
(See dialog box).
Procedure
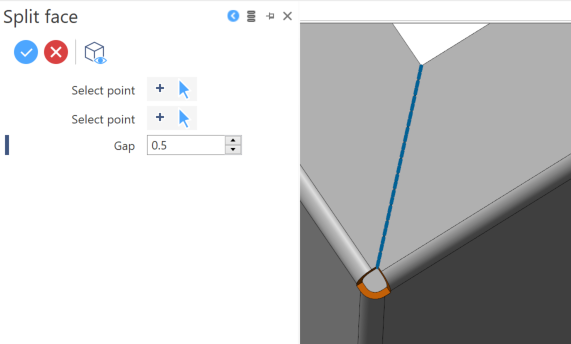
Select the two extremity points of a virtual split segment on a face.
- Select the first point.
- Select the second point.
- Define the Gap:
- By entering the value in the Gap field in the dialog box.
- By clicking on the Measurement
icon in the dialog box (next to the active field), and taking measurements.
-
Validate, either by a Right Mouse click or by clicking the
icon in the dialog box.
Example of split faces:

Dialog Box Options
Top Toolbar

These two icons at the top of the dialog box allow you to Apply the current values or to Cancel the current function.
Preview generation is Automatic if this option is active in the dialog box menu accessed by clicking on the ![]() icon. If this option is not active, click on the
icon. If this option is not active, click on the icon. If preview generation is not possible, the icon is greyed out.
Select point
Clicking on the
Use the icon (or Right Mouse click) to Validate your selection. The
icon (or [Esc]) cancels the selection mode.
Information Field
The field at the bottom of the dialog box displays information about missing data, errors or actions.
For further information...
